
Most 5-a-side teams press without triggers, defend without shape, and wonder why the same opponents beat them every week.
By David Findlay, Founder of KiqIQ.
Quick Answer: To win more 5-a-side games, remove tactical improvisation as a default. Commit to one formation, enforce one pressing trigger, and agree one rest-defence rule before kick-off. These three decisions outperform individual talent more often than any recreational team anticipates.
Definition: 5-a-side football tactics are the structured decisions a team makes regarding formation choice, pressing behaviour, transition shape, and defensive organisation within a small-sided format. With four outfield players operating in compressed space, every tactical principle runs at higher speed and shorter reaction time than the 11-a-side game, making role clarity and positional discipline the primary performance determinants.
Key point: In 5-a-side football, one positional error in a defensive transition can produce a goal-scoring opportunity within two to three seconds. Positional agreements made before kick-off are the single highest-return tactical investment any team can make.
While the definition is standard, the formation misfit between tactical structure and available personnel is where most 5-a-side teams fail to find a repeatable system.
Why 5-a-Side Football Tactics Differ From the 11-a-Side Game
The reduced player count, compressed pitch, and accelerated transition windows of 5-a-side football change the tactical environment fundamentally. In an 11-a-side context, a team can absorb a positional error through cover, depth, and recovery runs. In 5-a-side, that same error becomes an immediate counter-attacking opportunity with very little time to respond.
Three structural differences define this format:
- Space density: Less space per player makes pressing easier to initiate, but overcommitting is punished instantly with a one-on-one or a clear shooting opportunity before recovery is possible.
- Transition speed: Turnovers on a standard 5-a-side surface lead to goal attempts within two to four seconds, meaning there is no time for individual reactive decisions once possession is lost.
- Role overlap: Every outfield player carries both attacking and defensive responsibilities in the same phase of play, removing the positional separation that exists in the 11-a-side format.
These three realities explain why 5-a-side football tactics must be simpler, more repeatable, and more explicitly agreed before kick-off than in any other format of the game. Complexity is the opponent of execution at this level.
The 5 Core 5-a-Side Football Formations
All five formations below are structured around four outfield players and a goalkeeper. Each carries distinct strengths, weaknesses, and personnel requirements. The comparison table below provides a structured reference to help identify the right starting point for your squad.
| Formation | Structure | Key Strength | Key Weakness | Best Personnel Fit |
|---|---|---|---|---|
| Diamond (1-2-1) | 1 holder + 2 central players + 1 striker | Balanced attack and defence with a strong central spine | Vulnerable to wide overloads if both central players lose shape simultaneously | Mixed-ability squads requiring reliability and balance |
| Square (2-2) | 2 defenders + 2 attackers | Solid defensive base with a double attacking outlet | Predictable without a natural wide threat to stretch opposition | Teams with two dominant centrally focused players |
| Defensive Block (3-1) | 3 defenders + 1 striker | Compact and very difficult to break down through the middle | Very limited attacking output and poor transition potential | Teams protecting a lead or facing physically superior opponents |
| Attacking (1-3) | 1 holder + 3 attackers | Maximum attacking presence and overload potential in the final third | Single holder is exposed if the transition from attack to defence is slow | Teams with one elite holder and multiple fast technically capable attackers |
| Y-Shape (2-1-1) | 2 defenders + 1 central pivot + 1 striker | Flexible central link between the defensive and attacking lines | Collapse risk if the pivot cannot receive and distribute under pressure | Teams with one technically dominant central player who can operate as a hub |
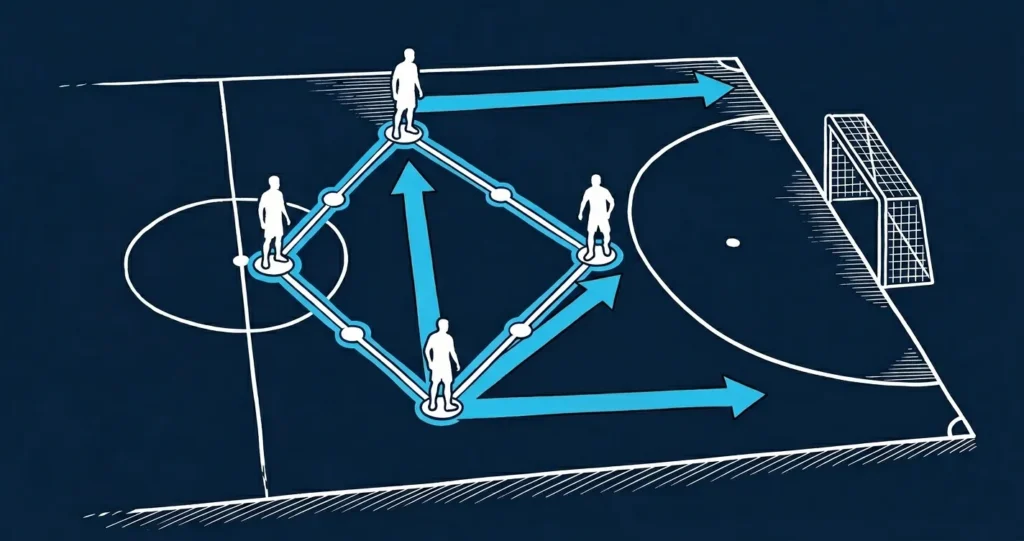
Diamond (1-2-1)
The diamond is the most commonly used structure in UK recreational and competitive 5-a-side football. One holding midfielder operates between two central players and a single striker. The central spine provides both defensive cover and attacking supply lines, making this the most resilient choice for mixed-ability squads. Its primary vulnerability is width: if both central players are pulled wide simultaneously, the holder is exposed alone against a fast counter-attack.
Square (2-2)
The square pairs two defenders with two attackers. It offers defensive stability and clear positional zones but becomes predictable without a natural wide threat to stretch the opposition shape. It suits teams with two strong centrally dominant players but struggles against organised opposition that presses the central channel early and forces the build-out wide.
Defensive Block (3-1)
Three defensive players and one forward. This structure sacrifices attacking mobility almost entirely in exchange for a compact shape that is difficult to break down. It works best when protecting a narrow lead in the final stages of a game or when the opposition’s physical advantage makes a balanced shape unsustainable. Without fast and precise transitions from the block into the forward player, it offers almost nothing in the final third.
Attacking (1-3)
One holding player and three attacking players. This maximises forward presence and overload potential in the opposition half but places extreme demand on the single holder, who must screen the full defensive line alone. Very few recreational 5-a-side teams carry a player with the positioning, reading of the game, and passing range to make this structure viable at a consistent level over a full match.
Y-Shape (2-1-1)
Two defenders, one central pivot, and one striker. The Y-shape provides a flexible link between defence and attack through the pivot player, who becomes the system’s primary distribution hub. The collapse risk is real: if the pivot cannot receive under pressure and switch play quickly, the structure loses its function and the team inherits the weaknesses of both the 2-2 and the 1-3 at the same time.
5-a-Side Football Pressing Tactics and Trigger Points
Pressing in 5-a-side is not about chasing the ball. It is about applying coordinated pressure at a pre-agreed trigger point to force an error or direct the opposition into a low-value area of the pitch. Random pressing is worse than no pressing, because it creates the very spaces it is intended to prevent.
Three pressing triggers are consistently effective across skill levels:
- Back-pass trigger: Press immediately when the opposition plays back to their goalkeeper. This limits the quality of the restart and forces a distribution under time pressure, often producing a poor clearance or a free ball in the central zone.
- Side-wall trigger: Press when the opposition receives close to a boundary wall or sideline. The reduced escape angle significantly increases the probability of a forced turnover without requiring two players to fully commit from the defensive structure.
- Heavy-touch trigger: Press when a receiving player’s first touch takes them away from their intended direction of play. This requires two players to press in sequence: the first applies immediate pressure, the second cuts off the recovery pass before the player can recover their position.
The structural rule governing all three triggers is the same. Pressing in 5-a-side must involve at least two players moving in coordination. Solo pressing leaves the rest-defence exposed and creates the exact transition window that well-organised teams exploit within three seconds of winning the ball.
5-a-Side Football Defending Tactics
Defending in 5-a-side football operates across two distinct phases. Teams must understand which phase they are in and have agreed their positional responsibilities before the game begins, not during a goal kick or a substitution midway through.
The high block applies pressure at or beyond the halfway line. It is aggressive and energy-intensive and works well against teams with limited technical ability in their own half. The primary risk is the space left behind the last defensive player. In 5-a-side, that space is rarely recoverable without immediate goalkeeper involvement at the right moment.
The low block involves retreating quickly into a compact shape in front of goal, forcing the opposition to play around the structure rather than through it. It is the more sustainable defensive option in the final stages of a close game, when energy levels drop and individual recovery runs become unreliable.
The single most important defensive principle in 5-a-side football is the rest-defence rule. This is the positional reset all four outfield players return to within the first two seconds of losing possession. It is not a zonal system or a man-marking instruction. It is a structural agreement that prevents the open-space counter-attacks that produce the majority of goals in recreational 5-a-side football at every ability level.
Attacking Rotation and Width in 5-a-Side Tactics
Attacking play in 5-a-side is constrained by the number of available passing options at any given moment. Teams that generate movement create options. Teams that stand still reduce every attack to individual talent, which is a poor tactical strategy even when that talent is significantly above average.
Rotation is the most transferable attacking principle from the 11-a-side game to 5-a-side. In a diamond formation, the striker’s off-the-ball movement dictates whether the pivot can play through the opposition’s defensive structure or must switch and build again. A striker who holds a single fixed position removes the system’s most important attacking option and makes the pivot’s job almost impossible under pressure.
Third-man runs are equally applicable in compact 5-a-side spaces. A pass is played to a second player and a third player runs beyond the defensive line to receive the return. The shorter distances do not eliminate this pattern. They demand faster decision-making from all three players involved but produce the same goal-scoring opportunities when executed correctly.
Width is consistently under-used in 5-a-side football tactics. Most squads cluster centrally and eliminate the ability to stretch a defensive shape. A single player committed to holding width forces the opposition to either engage and open central lanes or hold and concede the wide areas. Neither outcome is comfortable for a team organised to defend only through the middle of the pitch.
Transition Principles: The Most Overlooked Element of 5-a-Side Football Tactics
The transition moment, the two to three seconds immediately after possession changes, is where the majority of 5-a-side games are ultimately decided. Both the attacking transition and the defensive transition require explicit team agreements before kick-off to be executed consistently under match pressure.
In the attacking transition, the first decision must always be forward. If an immediate forward pass is available, play it. If not, hold possession, reset into the agreed formation, and build from a stable structure. The most common mistake after winning the ball in recreational 5-a-side is a sideways pass under pressure, which invites an immediate press and produces a second turnover before the attack has had any opportunity to develop.
In the defensive transition, the rest-defence rule applies from the first second. The player closest to the ball applies immediate pressure to slow the counter. Every other outfield player moves to their agreed positional reset. There is no version of this decision that should be left to individual instinct in a pre-organised team. Individual instinct in a defensive transition is the single most reliable way to lose a 5-a-side game that your team was winning.
The Strategic Cut: What to Stop Doing in Your 5-a-Side Tactics
Tactical improvement in 5-a-side football depends as much on removing poor habits as on introducing new principles. The following behaviours carry high execution cost and very low performance return and should be eliminated from any serious tactical structure:
- Solo pressing: One player pressing without a second supporting immediately behind creates an exposed lane that fast attackers will target in transition before the defensive shape can recover.
- Mid-game formation changes without verbal agreement: Changing shape under pressure without communicating explicitly breaks every positional assumption the rest of the team is operating on. The outcome is confusion, not improvement.
- Attacking exclusively through the central channel: Central overload invites a double press and removes the width that stretches opposition structures. One player holding wide changes the entire defensive calculus for the opposing team.
- Standing still when out of possession: A stationary player in a defensive phase is a positional liability in 5-a-side. Every player not pressing must be actively moving to their rest-defence reset position, not watching the ball.
- Ignoring the goalkeeper as a passing outlet: On most 5-a-side surfaces the goalkeeper is a legal and available short-pass option during build-out phases. Teams that ignore this reduce their own escape routes under pressure and increase the turnover risk in their own defensive half unnecessarily.
Frequently Asked Questions About 5-a-Side Football Tactics
What is the best formation for 5-a-side football tactics?
The diamond (1-2-1) is the most versatile and widely used formation in 5-a-side football tactics. It balances defensive cover with attacking supply and functions across most personnel combinations and ability levels, making it the safest default for any team with limited time to embed a more complex shape.
What are the best 5-a-side football defending tactics?
The most effective 5-a-side football defending tactic is the rest-defence rule: a pre-agreed positional reset that all four outfield players return to within two seconds of losing the ball. Combined with a single pressing trigger applied by two players in coordination, this system prevents the majority of counter-attacking chances at recreational level.
What tactics work best for 5-a-side football when chasing a game?
When chasing a game, shift to the 1-3 or 2-1-1 formation to increase attacking presence in the final third. Use the back-pass trigger as the primary pressing mechanism to force turnovers high up the pitch, and instruct all outfield players to arrive into the box from late rotation runs rather than holding fixed positions that the opposition has already read.
Do 5-a-side football tactics change on different playing surfaces?
Yes. On an outdoor astroturf or grass surface, transitions are faster and wide play is more sustainable, making the diamond and 2-2 the more effective starting structures. On an indoor surface with boundary walls, pressing traps against the wall become more powerful and the side-wall trigger produces higher turnover rates with lower defensive risk.
How useful are 5-a-side football tactics videos for team improvement?
Video content is a useful supplementary tool but not a substitute for pre-match agreements. The most effective use of 5-a-side football tactics video material is to illustrate one specific pressing trigger or rotation pattern, rather than attempting to replicate an entire system without the training time to embed it before competitive matches.
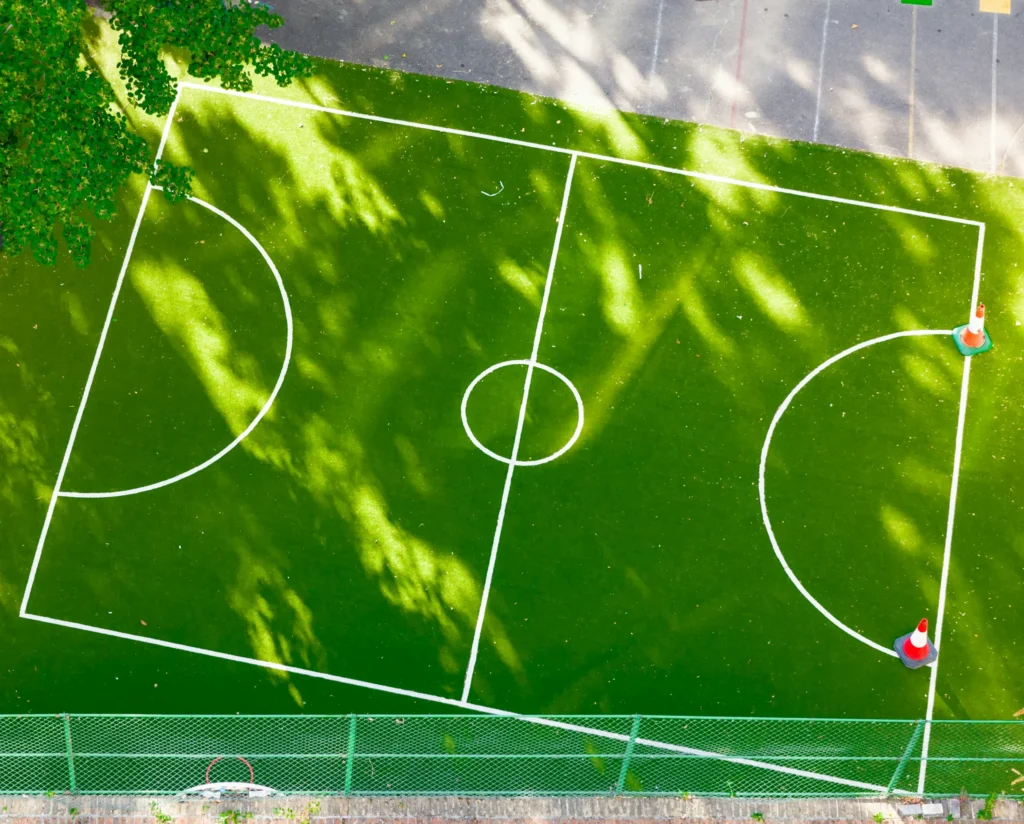
What size is a standard 5-a-side football pitch?
A typical 5-a-side football pitch is around 36–40 metres long and 25–30 metres wide (about 40 × 30 yards). Exact dimensions vary by facility, but most pitches fall within a range of 25–50 metres in length and 16–35 metres in width. The smaller playing area increases pressing intensity and reduces reaction time, making tactical discipline more important than in the 11-a-side game.
What are the basic rules of 5-a-side football?
5-a-side football is played with four outfield players and one goalkeeper per team on a small pitch. Matches typically last 20–40 minutes, substitutions are usually rolling and unlimited, and games often use small goals without offside rules. Most formats also restrict slide tackles and heavy contact, placing greater emphasis on quick passing, movement, and controlled pressing.
Sources
- Football Matcher: 5-a-Side Football Strategies and Formation Guide
- Experience Footy: How to Win at 5-a-Side Football
- Football DNA: 5-a-Side Formation and Tactical Structure Analysis
- Generation Elite: 5-a-Side Football Formations and Tactical Guides
- Reddit Bootroom: Practitioner Discussion on 5-a-Side Tactics